After finishing my first Journal Cover ~ [separate post] ~

This first one was a straight out copy of a beautiful creation of Gabrielle Pollacco's : [Such a Pretty Mess blogspot], ~ I decided to have another go and try to be a bit more original.
Although she was very complimentary, and shared how she did hers on her blog, posting a great step-by-step tutorial and video as well, I still feel really weird about copying someone else's work.
So this venture will be my own ... however, if you're a follower of Gabrielle's, you'll see that I have copied her use of the Dusty Attic Seagrass chippie. She used this in a canvas she made of a mermaid.
I love Dusty Attic cut-outs. So beautifully detailed!
Problems : ARRGGHH!
I couldn't believe it ... when I unwrapped this Strathmore Journal, [bought on Blitsy a few weeks ago], it didn't have a cover! How can you make a journal cover, if the journal HAS NO COVER?!
Well, you make the cover.
 |
| This yellow front page is thicker than paper, but certainly not card! It didn't even have a plastic cover. |
I use a lot of this watercolour paper, below.

It's a Reno brand, A3 pad, from my local dollar store and these are great value at around $10! The pages are lovely and thick and they make great card-bases! I was so glad I'd kept the empty pad ...
 |
| See the bumps at the top? |
I cut it with my Craft knife, but it took a few goes to get through the thickness. The holes even matched. BUT, it was about a centimetre too short. At first I just thought "What the heck!" but then decided to have a go at extending it.
I drilled five holes into the edge, then again in the strip, just using my Dremel that I use for drilling seaglass. The Dremel HATED the cardboard.
Eventually I got there, and glued in tiny pieces of toothpick ... then Gesso-ed over everything a few times. You can see the marks here even though everything's glued and seems strong, but this will be covered by Texture Paste on the outside and strong paper on the inside of the cover, so it shouldn't matter.
I'll use the hard, strong back that came on the Strathmore Journal as the front cover, and the homemade cover on the back where it's less noticeable.
First Steps :
I covered both sides of the front and back covers with Gesso. When you do this on an art journal, don't forget the edges. Stuff ~ sprays and water, paints and texture paste ~ gets everywhere, so you don't want to allow anything to soak into your covers, destroying all the work you've done making them special.
I gave this overnight to dry, as I'd applied two/three coats.
Adding Texture Paste :
I use homemade texture paste. Thank you Gabrielle, for adding this great recipe to your blog. I'm on my third lot now and it always makes up brilliantly! It mixes well, spreads easily and dries pretty fast on the project. It takes colour really well, and doesn't chip or peel away. You can also sand it, but I think it's easier if you remove any little mistakes before it dries ... just scrape anything you don't want away with a palette knife.
I used the following stencils for this journal cover :
 |
| 'Shine', by Memory Box |
 |
| Stencil Girl : S133 'Mayne' |
 |
| Ranger Dylusions : Dyan Reaveley : 'Bubbles" Large |
 |
| This little set is lovely. Bought from Ebay, very low priced ... not sure of seller. |
I started with the 'Shine' stencil, and placed it up in the top left ... hoping to give the impression of sunrays slanting through the water.
 |
| This 'light ray effect' maybe needs extending down further into the water, but will do this with light acrylic near the end ... if I need to. |

They make it look so easy on Youtube ... but I can't do it! Better to wait!
Then I added the bubbles, again in a couple of lots, because I always catch the edge of the stencil on the wet texture paste if I try to do it all at once!

I scraped away a few sections that didn't make the complete round shape, or weren't where I wanted them.
Next I added the seahorse, and then some scallop shells [really pretty, like a fan!], and a conch.
 |
| I hadn't intended to use the seahorse .. .was planning to use a die-cut turtle ... remembered the seahorse and it was perfect. Really happy with this, but will probably add the turtle as well, it's only small! |
Now I'm leaving the whole lot to dry overnight!
* * * * *
I Needed Another Hole ...
When I made the back cover, and added the strip to get the right size, I was one hole out for when I'd have to reattach the spring. Wide awake at 1.30am, it hit me ...
Four tiny holes drilled at the corners of the square, then with the drill sliding sideways, it took five minutes ... a quick file, a coating with gesso and it was done.

Don't know why it took me so long to figure it out ... it's a classic jewellery technique for getting into the middle of a piece of metal without sawing in from the edge, and dead easy! Not the neatest, but none of the other holes are either, and IT WORKED!!
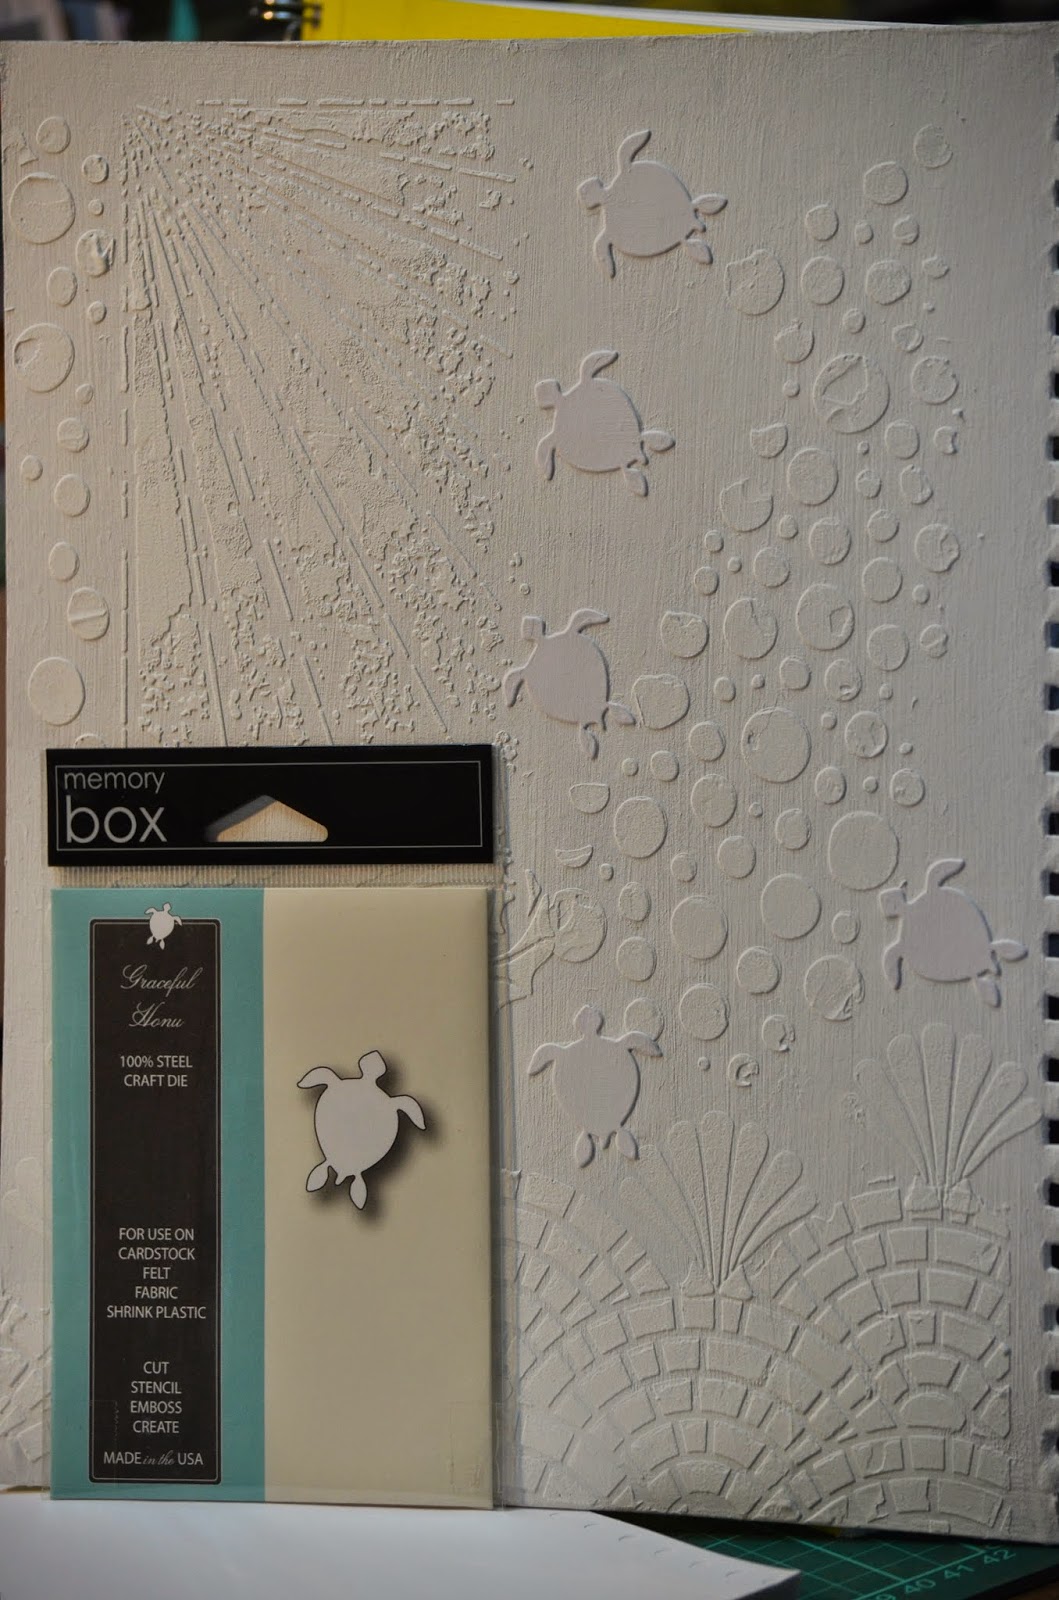
I've also now added some small turtles, using dies-cuts from a Memory Box die called Honu. Also a fish ... and a few more bubbles ...
 |
I think the back is pretty well finished ... apart from colour and a little stencilling perhaps. |
 |
| I've added some small turtles, heading for the light, and a Dusty Attic 'Seagrass' in small size. I love this ... it's so graceful! |
I went over the seahorse on the front with another application of Texture Paste, just to get him to stand out a little more. Not hard, and it works fine ... just be careful to line up the stencil perfectly.
Adding the Colour :
Finally ~ this is the fun part, and I must say, the tones of pale sea-blue and silver that I'd had in my mind just didn't happen.
 |
| For the basic colours I used, from the bottom ... Smooch Spritz 'Copper', Flat Fabio [Lindy's Stamp Gang] in an olivey green, and lots of Glimmer Mist at the top in 'Seaglass'. |
You can see here [above], that I've started adding gold for the rays of light. I used two pots of different Inklingz for this ~ both gold, but "Blue My Mind' has a blue sheen, so I used this for the seahorse and the turtles, and part of the seagrass.
I used the 'Miner, Miner' for the bubbles and the rays of light.
 |
| Inklingz "Miner Miner' is a pale, cool gold. |
 |
| I've darkened the scallops with a mix of Twinkling H2O's ... a red one and one called Cedar, which toned down the bright red. I've also painted a little gold between paving patterns at the bottom. Mainly because I spilled it on my craft mat and could only soak up so much with a syringe! Wow, so handy to have one on the table! But I didn't want to waste the rest so I added it at the bottom. I was pleased that I did. |
AND NOW MY FAVOURITE BIT ... adding gems ... I love this bit ...
Most likely I added too many ... but I have control problems where this is concerned!
 |
| I used BoBunny gems from a couple of different packets I had open. |
And now a few photos of the details :


So now I can say I've made a Journal Cover, start to finish, by myself without needing to copy anyone.
I would like to say a huge Thank You though, to Gabrielle Pollacco, whose Steampunk Journal cover gave me the inspiration and the knowledge to be able to create something like this myself!
And here is the full Journal cover, all put back together, showing the front and back.

Thank you SO MUCH to anyone who manages to wade through this ... it's very long and not all that well put together. This is the first time I've added a detailed 'How to make something' kind of blog post, so again, thank you for visiting my blog and I hope you may want to return!
Thank you so much for all the details, it it amazing, I love it, and you have inspired me to maybe, just maybe have a go one day!
ReplyDeleteThank you SO, SO much Marcelle. I really value your opinion, and am amazed that you got through this!
DeleteThis has turn out just beautiful - Love the colours you have used also
ReplyDelete(Jen Burns - Dusty Attic)
Oh my goodness! This is amazing!
ReplyDeleteHeather, thanks so much for this lovely comment. The first one I did was a straight out copy of Gabrielle's, so I'm really pleased to be standing on my own two feet a little bit more.
ReplyDeleteWOW! Your album is beautiful. Gabrielle Pollacco's steampunk album was my first introduction to Mixed Media too. Her work is gorgeous but yours is wonderful too. I love the blending of your colours.
ReplyDeleteFANTASTIC turly beautiful. Elena.
ReplyDeleteThank you Elena!! I loved making this, and really enjoy using the journal.
DeleteWOW! WOW!! WOW!! You did a GREAT job with this! Amazing cover for a coverless journal!!! :)
ReplyDeleteThank you so much Lisa! I was lucky to have a back of a watercolour pad where the holes lined up. I think when I bought it from Blitsy they may have removed the cover to lessen postage weight. It still had one cover on it, but I know they should come with two ... I've bought these Strathmore journals before. [PS : Have you checked out Blitsy?]
Delete